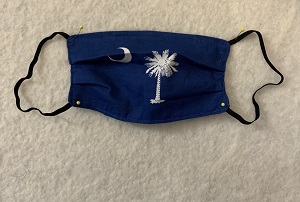
A design wall in your home or place of business can provide a way to experiment with different arrangements of fabric or other projects you may have in order to get an idea of how different pieces and colors fit together before sewing or finalizing your project. We have included masks and other odd shapes in quilts, for instance. A mask can be pinned on to the design wall with straight pins on top of a portion of a quilt to see how it will look with or without the loops and with or without other masks– in this case we’re including 4 of the same mask in a quilt. Once pinned, it is easy to move the shapes around to get them in the ideal position.
We use our design walls daily to share progress updates with customers and also to make sure that all of the involved pieces fit as intended as a way to proof our pre-designed pattern. Customers enjoy the live look and we can easily accommodate any layout changes at that point that can help reach a final decision. Redfin tapped into quilting experts for thoughts on creating a home quilting workspace. If you don’t quilt or sew, the same concept can also be used to show off collections you may have that can be pinned such as posters or photos. We were happy to be included in this informative article. https://www.redfin.com/blog/ultimate-quilting-room/
Here’s more on getting started on your design wall:
- Pick a wall to cover that is easily accessible that you won’t be needing for anything else. Measure the space you’d like your design wall to cover. This is semi permanent, meant to stay up for awhile and is not portable.
- Buy foamcore boards to fit your wall. They come in different thicknesses such as 1/2″ – 1″. These are the long pink Pink Panther insulation boards that usually go behind drywall. Home Depot has them. They can be trimmed to fit using a razor. Keep in mind that if you choose a thickness such as 1″, your wall will protrude from the dry wall by that additional distance.
- We cover our design walls with quilt batting. Measure enough batting to cover the front of each board and then to fold over to the back about 4”. We can sell it by the yard if you need some. Call 678-324-8084.
- Tape the batting down on the back side with duct tape.
- Cover the batting with fabric if desired.
- It helps to have a helper so that one person can hold the board and while the other handles nailing it to the wall. 2” nails should work. You’re done! Enjoy!


An earlier related post back from before moving in to a commercial space. https://justtshirtquilts.com/real-time-layouts/
Thanks again Ryan for the mention. A Cape Cod on the beach. Aahhhh. That’s something to aim for!
